Tuesday, November 27, 2012

Jack's House - Karen's Wall

The neighbor on one side of Jack's house is Karen, so I call this first wall Karen's wall.

First we pulled some material off the wall to assess what would need doing.  Here's some very rotten siding peeled off the base of the wall.  With the tar paper lifted, we can see what we are looking at there.  The sill plate is very soft.  The underlying insulation has been affected by insects and the sill plate shows some damage from insects as well.


All the siding will be replaced, so no use delaying.  Here is the wall with siding removed below the double top plate.  The sliding glass door has also been removed, and the broken window will be taken out shortly.


toward the front of the house, the corner window is out, and all the insulation has been removed.  The siding you see here is simply a temporary measure to close up the house at the end of each work day.

Closeup shots of the studs at the left and right of the sliding glass door.  Note the rot is so bad, the studs don't actually go to the concrete.  the sill plate is essentially missing here.


From a little further away, this shows the termite trails running up the studs on the right side of the doorway.

More of the same.

No way to do all this in one day, so here we are at the end of a workday, with the temporary siding applied to the wall.  This is the cheap hardy siding that comes in 4x8 sheets.  I think it was around $11.00 a sheet or something like that, but has really helped.


From the inside of the house.  Jack has started removing sheetrock in the front corner, as we will need to replace the sill plate, and reframe that window to fix damage.


Heading to the back of the wall, where one of the bedrooms is located, the broken window is gone, all the sheetrock and insulation is out.  There's a picture missing of the studs below this window.  I will need to find it.


Here, the new sill plate is going in.  We used a pair of 4x4s to drive up the double top plate about 1/4 inch, allowing the sill plate to be cut out without removing the wall studs.  In this first photo, the old sill plate is actually gone, the replacement treated 2x4 is still loose on the foundation ready to go in.


Here, the sill plate installed.


4" molly bolts hold the sill plate to the concrete.  

Hitting a sill plate with a sledgehammer to remove it, while the old mollys are still attached, is a bad idea :-)  Here some concrete was patched up.


On this wall, both windows and the door opening will all need to be reframed to fix damaged wood.  The house inspector suggested we paint the studs at the door opening, to give them a little extra protection should moisture make it behind the door frame.

The window opening, reframed, at the front of the wall.

The door opening reframed.


And, a shot of the whole wall.  All the bright wood is new.  The orange-ish wood is original.  On this wall, there were no real problems with the double top plate, and only a couple of studs other than windows and doors were damaged.  Not too bad, really.


After reframing, we applied an R4 Exterior Sheating by Owens Corning, called Foamular.  Its a moisture and  air barrier, but will also provide a little insulation, and improve the noise rejection properties of the house as well.  Once the wall is sheathed, tape all seams, and cut out openings for doors and windows. (and attic gable vents, which we will do later)


A shot from inside, showing the back side of the foamular.  


Once the foamular is on, apply tyvec house wrap.  Its sort of a belt-and-suspenders thing, but we really do not want moisture to come into the house.


Rinse and repeat for 3 other walls!


Jack's House - Water Heater Failure

At Jack's house, the first project to tackle was the hot water heater and enclosure.  In this house, the hot water heater is in a closet of sorts, in the garage.  The existing hot water heater leaked quite severely, and had been leaking for some time, it appeared.  We tackled this first so we could have the city turn on the water.

Here's the old hot water heater, removed from the enclosure and awaiting disposal.

And some debris from the enclosure, now removed.  Those are termite trails on that wood on the driveway!


This is what the wall looked like behind the enclosure.  Much of this will need to be removed.  It looks like the termites may have followed the water from the leak up through the hole in the foundation where this old drain line runs out.  That line will be removed, and the drain line will be routed through the front wall of the house.


Jack may have more photos showing progress, but after removing all studs, sheetrock, and other lumber with damage, the enclosure is rebuilt, inspected (and passed!).  A plumber was used to install the hot water heater in the new enclosure, along with an expansion tank (required for code).  The inspector did have the plumber return and install a different gas cutoff arrangement.


We need a picture of the inside of the enclosure.  I'll add one to this post later.

Monday, November 26, 2012

About Jack's new house

So, Jack bought a 1980 2-bedroom 1 bathroom, 1 car garage house, around 980 square feet, sitting on a half-acre of land at the back of a culdesac.  From the front, it looks a little aged, but really doesn't look too bad.  That of course is where someone covered up all the problems to improve street appeal :-)

We have a couple of friends who live on this street, they report that at one point, at night, one could see light coming through the walls around this front window, if lights were on in the house, from damage to the siding and trim around the window.  Evidently the roof was replaced around 2 years ago, so that is good.  Jack did hire a structural engineer to look at the foundation, as several cracks are present.  The engineer assured us the house is fine, no remediation is required.  The total shift in horizontal elevation from diagonal corners across the foundation is around 1 inch, well within tolerances.


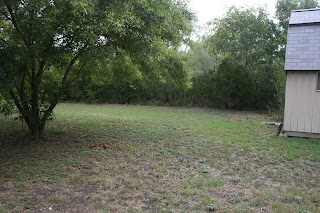
The house came with a pretty nice shed, it too has some problems but they are minor.


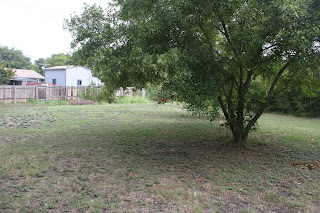
And, the house sits on a half acre


Now for the down side:

House maintenance has been severely neglected, so paint is very bad, and the underlying trim, siding, and soffets are all pretty rotten.


This side of the house shows the worst damage.  This window is particularly bad (in addition to being broken, I mean :-)  One can see a repair attempt to siding was made at some point, where the beige siding is showing.


Some longer views of the wall that contain the broken window, this one shows the front half of that wall, and the front window.  Also shown is the sliding glass door, which happens to be open.  that is not a hole, that is an open door :-)


Going inside the house, the front door opens onto the livingroom:


The classic 2-bedroom tunnel kitchen.  From a distance it doesnt look so bad.  up close, several cabinets are missing trim on the doors, and the cabinet bases are somewhat rotten.  But, it does have a nice stainless steel sink.  The refrigerator is gross, but works.  The stove is gas and leaks like a sieve, so it has to go.  The dishwasher probably needs replacing as well.


There is a utility area behind the kitchen.  Thats an odd arrangement, but the house is not deep enough to put the utilities elsewhere.  A pantry would have made more sense here if there were room for washer/dryer elsewhere. Maybe a stackable on the washer side, and a pantry where the dryer is now, would make sense. The washer and dryer don't work.

 Dryer

Washer

Growth marks from children, with dates.  This made me sad.  Someone may have been happy here once, but it does not show in the care taken of the house itself.  I wonder what happened to everyone.

Two bedrooms, each with a window.  In this first bedroom, it is pretty obvious where the bed was.

This second bedroom stinks very badly.  The carpet probably was holding moisture from water leaks.  It doesn't smell like cigarette particularly.

The bathroom... Filthy tub, and the sink does not fit into the vanity.  but the toilet flushes which is convenient. Note the classic vice-grip faucet handles :-)


So that is where we begin with a remodel of Jack's new house.